
How to clean inside of leather bag safely

How to clean inside of leather bag sounds simple until crumbs, makeup dust, old receipts, pen marks, and mystery grit start hiding in the corners. A leather bag can look polished outside while the lining quietly turns into a tiny junk drawer. Yikes, it happens fast. The tricky part is that the inside often uses fabric, suede-like lining, microfiber, or unfinished leather, so rough scrubbing can make the mess worse instead of better.
A smart clean starts with emptying every pocket, turning the bag upside down, and giving the seams a gentle shake. Then a soft brush, lint roller, or handheld vacuum can lift dry dirt before moisture touches anything. That step matters because dry debris can smear into fabric once liquid gets involved. Slow and steady wins here, especially around stitched corners where dust loves to camp out.
For fabric lining, a barely damp microfiber cloth with a tiny drop of mild soap usually does enough without soaking the material. The cloth should feel damp, not wet, because excess water can seep toward the leather shell and leave marks. Blotting beats rubbing, particularly near stains from lipstick, lotion, or snacks. A little patience keeps the lining from pilling, stretching, or holding a musty smell later.
If the interior is suede, raw leather, or a delicate textured surface, moisture control becomes the whole ballgame. A suede brush, soft toothbrush, or clean white cloth can loosen dirt without pushing it deeper. For odor, an open pouch of baking soda placed inside overnight can help, but loose powder should stay away from the lining. Nobody wants a bag that smells better but leaves chalky dust on everything.
Stains need a light hand because ink, oil, and dye transfer behave differently. A white cloth helps prevent color bleeding, while spot testing in a hidden corner keeps surprises out of sight. For ink, dabbing gently with a proper leather-safe cleaner or asking a repair shop is safer than gambling with alcohol. Leather bag care works best when the goal is steady improvement, not forcing the inside to look factory-new in one aggressive pass.
After cleaning, air drying is non-negotiable. The bag should sit open in a shaded, ventilated spot, away from heaters, direct sunlight, and hair dryers. Stuffing it loosely with clean tissue helps hold shape while the lining dries. Once dry, a final pass with a lint roller or soft cloth gives the interior that fresh, cared-for feel without overdoing it.

- TLR Rank9.4
TLR Rank is a ranking system developed by TravelLuggageReviews.com. TLR Rank has no relationship or impact from any manufacturers or sales agent websites. Learn more
- BrandBickmore

- TLR Rank9.0
TLR Rank is a ranking system developed by TravelLuggageReviews.com. TLR Rank has no relationship or impact from any manufacturers or sales agent websites. Learn more
- BrandLeather CPR
- TLR Rank8.8
TLR Rank is a ranking system developed by TravelLuggageReviews.com. TLR Rank has no relationship or impact from any manufacturers or sales agent websites. Learn more
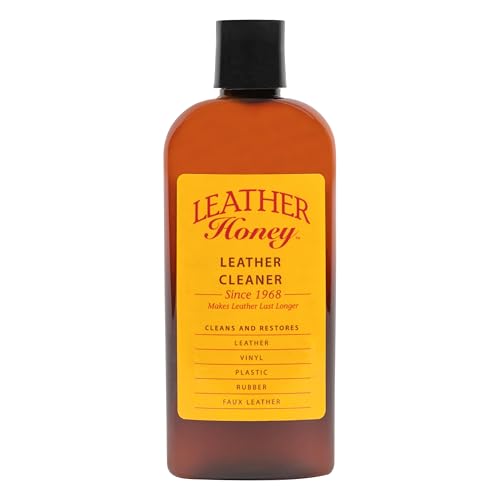
- BrandLeather Honey
- TLR Rank8.8
TLR Rank is a ranking system developed by TravelLuggageReviews.com. TLR Rank has no relationship or impact from any manufacturers or sales agent websites. Learn more
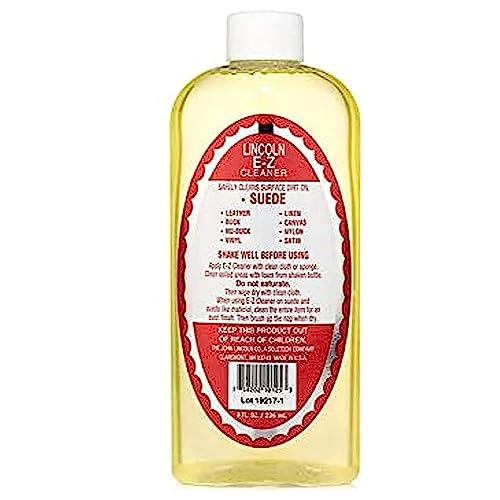
- BrandLincoln

- TLR Rank8.8
TLR Rank is a ranking system developed by TravelLuggageReviews.com. TLR Rank has no relationship or impact from any manufacturers or sales agent websites. Learn more
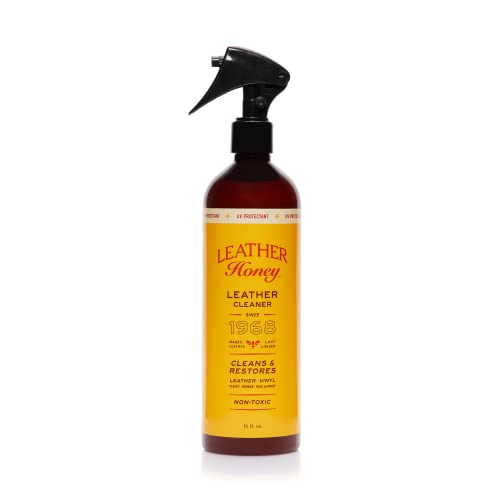
- BrandLexol
- TLR Rank8.8
TLR Rank is a ranking system developed by TravelLuggageReviews.com. TLR Rank has no relationship or impact from any manufacturers or sales agent websites. Learn more
- BrandLeather Honey

- TLR Rank8.6
TLR Rank is a ranking system developed by TravelLuggageReviews.com. TLR Rank has no relationship or impact from any manufacturers or sales agent websites. Learn more
- BrandCombat Cleaner

- TLR Rank8.4
TLR Rank is a ranking system developed by TravelLuggageReviews.com. TLR Rank has no relationship or impact from any manufacturers or sales agent websites. Learn more
- BrandLeather Honey
Last update on 2026-06-30 / Affiliate links / Images, Product Titles, and Product Highlights from Amazon Product Advertising API
How To Clean Inside Of Leather Bag Without Damage
A favorite bag can look polished on the outside and still hide crumbs, lint, makeup dust, pen marks, and that odd stale smell inside. That little mess builds up quietly because the lining takes the daily abuse while the leather exterior gets all the attention. A careful routine for how to clean inside of leather bag keeps the interior fresher without soaking seams, warping panels, or turning a small stain into a bigger headache. The goal isn’t to scrub hard, it’s to clean with light pressure, smart tools, and a bit of patience.
Leather Bag Interior Care
Leather bag interior care starts before any cleaner touches the surface. Empty every pocket, shake the bag gently over a trash can, and check the corners where coins, grit, and broken bits of makeup love to hide. A small flashlight helps because dark linings can make dirt look invisible until it rubs onto your wallet or phone. This first pass feels basic, but it prevents dry debris from smearing once moisture enters the picture.
A soft brush, lint roller, or handheld vacuum with low suction can remove loose dirt without roughing up the lining. Use the smallest attachment if the bag has tight corners or stitched pockets. Keep the nozzle slightly above delicate fabric instead of pressing it flat, since pressure can pull at seams. For gym shoes and messy extras that often dirty bag interiors, build a cleaner carry habit with sports duffle bags for shoes before grime gets into your leather tote.
Spot testing is the quiet little rule that saves expensive bags from ugly surprises. Touch a damp white cloth to a hidden interior corner and wait to see whether dye transfers, fabric darkens, or texture changes. If the cloth picks up color, stop using water-based cleaning on that area and switch to dry methods. A white cloth matters because colored rags can bleed and leave stains that weren’t there five minutes ago.
The outside leather should stay protected while the inside gets cleaned. Keep the bag open, but don’t fold leather panels backward or force the shape flat. Stuffing one side with clean tissue can support the structure while you work on the opposite side. This small detail helps protect bag shape, especially with softer leather that slouches under its own weight.
Dry Cleaning Steps First
Dry cleaning steps should always come before soap, water, or stain treatment. Crumbs, dust, sand, and powdery makeup can turn muddy if you rush in with a damp cloth. Start with gravity by turning the bag upside down and tapping the base lightly. Then sweep the lining with a soft brush, moving dirt toward the opening instead of pushing it deeper into corners.
A lint roller works well on fabric linings that collect fuzz, pet hair, and tiny paper bits. Press lightly and use fresh sheets often, because a dirty roller can drag debris across the same area. For tight seams, wrap low-tack tape around your finger with the sticky side out. That little trick grabs lint without soaking the lining or pulling threads when done gently.
Suede-like interiors need extra caution because moisture can flatten the nap and create patchy marks. Use a suede brush or clean toothbrush with short, gentle strokes. Work in one direction first, then lightly brush back if the texture needs lifting. Avoid stiff scrubbing because the lining may look cleaner at first, then feel rough and worn after it dries.
Vacuuming helps, but only with restraint. A strong vacuum can tug at loose stitching, pocket edges, or thin fabric lining. Use low suction and keep moving instead of holding the nozzle in one spot. This is especially useful after carrying snacks, receipts, cosmetics, or small tools that leave behind fine grit.
Safe Moist Cleaning Method
Moist cleaning should feel barely damp, not wet. Mix a tiny drop of mild soap with cool water, then dip a microfiber cloth and wring it until it feels almost dry. Wipe the lining in small sections and avoid flooding seams, corners, or leather trim. The less water you use, the lower the risk of stains spreading or moisture reaching the leather shell.
Blotting usually beats rubbing, especially around makeup marks, lotion smears, or food residue. Press the cloth onto the spot, lift, and repeat with a clean section of fabric. Rubbing can push oils deeper or create a fuzzy patch on woven lining. For school bags that carry notebooks, pens, and daily clutter, reduce interior stress by comparing designer tote bags for school with better pocket layouts before everything ends up loose inside.
Soap residue can attract new dirt, so follow with a second cloth dampened with plain water. Again, the cloth should be wrung out well. Wipe only the cleaned area, then blot with a dry towel to pull up remaining moisture. This rinse step matters because leftover cleaner can make the interior feel slightly sticky once dry.
Never pour cleaner directly into the bag. Sprays can land unevenly, soak hidden seams, or leave rings on fabric lining. Apply product to the cloth first, then touch the cloth to the bag. That tiny control shift keeps leather bag cleaning safer and helps you avoid the “oops, too much” moment.
Handling Stains And Odors
Interior stains need different treatment depending on what caused them. Ink, oil, lipstick, coffee, and dye transfer don’t behave the same way, so one aggressive cleaner can backfire fast. Start with the gentlest method and stop if the stain spreads, darkens, or feels tacky. A professional cleaner is the safer call for expensive bags, vintage pieces, or stains sitting near leather edges.
Ink is the troublemaker nobody wants to see inside a bag. Avoid soaking it with alcohol unless the care label or brand guidance allows it, because alcohol can strip dye or create pale spots. Dab with a clean white cloth and keep the motion tight around the mark. If the ink is fresh, quick blotting can reduce transfer before it settles deeper.
Odor removal works best with airflow and patience, not perfume. Leave the bag open in a shaded, ventilated room for several hours after cleaning. For stubborn smells, place baking soda in a breathable pouch or small open container inside the bag, making sure powder doesn’t spill onto the lining. Travel and errands can make odors worse, so pack lighter daily loads with a packable daypack when leather doesn’t need to carry everything.
Oil-based stains from lotion, snacks, or lip balm can leave a darker patch. Blot the area with a dry cloth first and avoid adding water right away. A small amount of cornstarch placed on a removable fabric insert may help absorb oil, but loose powder inside a lined leather bag can create another cleanup job. For fixed linings, professional care is often the smarter route if the stain is obvious or spreading.
Drying And Shape Protection
Air drying is where many people accidentally undo good cleaning work. Heat feels tempting because it speeds things up, but hair dryers, radiators, and direct sun can dry leather unevenly. Keep the bag open in a cool, shaded area with steady airflow. Give the lining time to dry fully before putting wallets, cosmetics, or papers back inside.
Shape support matters while the interior dries. Use plain white tissue, a clean towel, or acid-free packing paper to help the bag stand naturally. Don’t overstuff it because pressure can stretch leather or leave hard creases. The goal is gentle support, not forcing the bag into a showroom pose.
Moisture trapped in pockets can cause musty smells later. Check zipper compartments, slip pockets, and the base seam before calling the job done. Run a dry white cloth along those spots and see if it picks up dampness. If it does, leave the bag open longer and rotate its position for better airflow.
A final interior pass with a lint roller or soft cloth gives the bag a cleaner finish. This catches any loosened fibers, dust, or leftover grit from the cleaning process. Then rebuild the inside with fewer loose items, using pouches for pens, makeup, snacks, and receipts. Better daily organization keeps clean bag habits from turning into a big weekend rescue mission.
How To Deep Clean Leather Bag Lining At Home
Clean leather bag lining takes a little more care after the basic dry dirt and light stains are handled. The inside of a leather bag deals with coins, keys, receipts, lotion, makeup, pens, snacks, and whatever else gets tossed in during a rushed morning. Tiny messes hide in pocket seams, then show up later as odor, discoloration, or a gritty feel on your hands. A deeper clean works best when it stays gentle, organized, and controlled, not harsh or soaked.
The biggest mistake is treating every lining the same. Cotton, nylon, microfiber, suede, and raw leather all react differently to moisture and pressure. A fabric lining can usually handle a lightly damp cloth, while suede-like interiors need dry brushing and much less contact with water. That small difference matters because interior damage often starts from overconfidence, not from the original stain.
A leather bag also needs space to breathe while you clean it. Work on a clear table, lay down a clean towel, and keep your tools simple: microfiber cloths, a soft brush, cotton swabs, mild soap, and plain water. Avoid bleach, heavy fragrance sprays, and all-purpose cleaners because they can leave residue or discolor the lining. If the bag holds school supplies, laptops, and loose pens every day, a more structured designer tote setup can reduce the clutter that causes repeat interior stains.
Clean Pocket Seams Without Pulling Threads
Pocket seams are where small messes go to hide. Dust, pencil shavings, crumbs, loose powder, and dried makeup can settle into those narrow stitched lines and stay there even after a quick wipe. Use a soft toothbrush or small makeup brush to loosen debris without dragging the fabric. Short strokes work better than long scrubbing because they give you control around stitching.
Cotton swabs help around zipper tape, card slots, and tight corners. Dampen the swab slightly if the area has sticky residue, but don’t let it drip. Roll the swab instead of scraping with it, since scraping can fray fabric or push dirt behind the seam. This slow detail work protects lining texture while still lifting grime that a cloth can miss.
Loose threads should never be pulled during cleaning. Trim a hanging thread only if it’s clearly loose and not part of the seam structure. Pulling can open the stitch line and make the pocket weaker over time. A bag with damaged seams may still look fine from the outside, but daily use will make that weak spot spread.
Check pocket bottoms after cleaning because moisture can sit there longer than expected. Press a dry cloth into each pocket and hold it for a few seconds. If the cloth comes away damp, leave the bag open longer before storing anything inside. Dry pockets keep odors from coming back after all that careful work.
Remove Makeup Dust And Everyday Residue
Makeup dust can be sneaky because it doesn’t always look like a stain at first. Powder settles into fabric, foundation rubs onto pocket walls, and lip balm leaves a waxy film near the base of the bag. Start by brushing dry powder away before using any moisture. Wetting powder too soon can turn it into a paste that clings harder to the lining.
For light cosmetic residue, use a barely damp microfiber cloth with a tiny amount of mild soap. Blot the area, then lift your cloth straight up instead of rubbing back and forth. Rubbing spreads tinted oils and can make the mark wider. Keep rotating to a clean part of the cloth so you’re not moving old residue around.
Lipstick and cream makeup need extra patience. These stains often contain oils, waxes, and pigments, so they don’t lift like normal dirt. A small amount of leather-safe or fabric-safe cleaner may help, but only after a hidden spot test. If the stain sits close to leather trim, professional cleaning is safer than risking a ring or faded patch.
Daily carry habits make a big difference here. Keep cosmetics in a small pouch instead of letting them roll around loose. Caps crack, tubes leak, and powder compacts break at the worst possible time. That little pouch is boring, sure, but it saves the lining from the kind of mess that takes an hour to fix.
Freshen Odors Without Soaking The Bag
Bag odor usually comes from trapped moisture, old residue, food crumbs, perfume buildup, or poor airflow. Spraying fragrance inside may hide the smell for a day, but it can leave sticky residue or clash with the leather’s natural scent. Air is the first fix. Open the bag wide and let it sit in a shaded, dry room with good ventilation.
Baking soda can help, but it should stay contained. Place it inside a small breathable pouch, clean sock, or open cup that won’t tip over. Loose powder inside a leather bag creates another cleaning job, especially if it gets into seams or textured lining. Leave the pouch inside overnight, then remove it and air the bag again.
Activated charcoal pouches are another low-risk option for stubborn smells. They don’t add fragrance, and they can sit inside the bag between uses. Just keep them away from damp spots and replace or recharge them according to the product directions. A fragrance-free approach keeps leather bag odor control cleaner and less fussy.
Travel bags tend to pick up odors faster because they sit on floors, in cars, and near food. Keeping a separate lightweight pack for rougher days can protect leather from sweat, snacks, and crowded transit messes. For trips where leather feels too delicate, a practical jansport backpack can take the heavier load while the leather bag stays cleaner. That tradeoff keeps daily style from turning into constant maintenance.
Protect The Interior After Cleaning
Interior protection starts after the bag is fully dry. Put items back slowly instead of dumping everything in at once. Pens, perfume, lotion, hand sanitizer, and makeup should go into small pouches with secure closures. This habit doesn’t feel fancy, but it stops the most common leaks and marks before they start.
Bag organizers can help, though they’re not always right for every leather bag. A stiff organizer may stretch soft leather or change the natural shape. A thin, flexible insert is usually safer for slouchy bags because it adds pockets without forcing the sides outward. The best choice depends on bag structure, weight, and how much you carry.
Keep food out of the bag whenever possible. Granola bars, candy, crackers, and gum seem harmless until wrappers tear or crumbs settle into corners. If snacks need to come along, use a sealed pouch and clean it often. Small prevention steps beat deep cleaning dried chocolate out of a fabric lining later.
Receipts and paper clutter also make the interior feel dirty faster. Paper sheds lint, ink transfers, and folded corners scratch softer linings. Empty receipts at the end of the day or keep them in one flat pocket. A clean interior feels easier to maintain when random paper doesn’t pile up in the bottom.
Know When To Stop Cleaning
Knowing when to stop protects the bag as much as any cleaner does. Some stains fade but don’t disappear completely, especially ink, old oil, and dye transfer. Pushing harder after the stain stops improving can damage the lining more than the mark itself. A lighter stain on intact fabric is better than a scrubbed patch that looks worn and fuzzy.
Stop immediately if the lining bleeds color, feels sticky, puckers, or develops a water ring. Blot the area with a dry white cloth and let it air dry. Don’t keep adding cleaner in hopes of balancing the mark because that often spreads the damage. At that point, bag repair specialists have better tools and safer options.
Vintage leather bags deserve even more restraint. Older adhesives, dyes, and linings may react badly to moisture even if they seem sturdy. A dry clean with brushes, lint rollers, and odor pouches may be all they can safely handle at home. That doesn’t mean the bag is too fragile to use, only that it needs slower care.
Set a simple maintenance rhythm after the deeper clean. Empty the bag weekly, brush the corners, air it out, and wipe small marks before they settle. Keep liquids capped and sharp items in pouches. Those little habits keep how to clean inside of leather bag from becoming a rescue project every few months.


10 Best Sleeping Bags For Tall People of 2026 To Stretch Out Fully

10 Best Diaper Bag Backpacks For Dads of 2026 With Fast Gear Access

9 Best Diaper Bags For Twins of 2026 With Dual Compartments

10 Best Rebecca Minkoff Leather Crossbody Bags Over 300 of 2026 With Genuine Everyday Capacity

11 Best Marc Jacobs Bags of 2026 For Daily Essentials

10 Best Fossil Handbags of 2026 For Everyday Organization

10 Best Tory Burch Handbags of 2026 For Everyday Wear

11 Best Kate Spade Handbags of 2026 For Work and Daily Carry









